Importing Contacts - Direct Debit Request Forms
Introduction
Payrix + Xero enables you to automate invoice payments using direct debits on card and bank accounts.
This is usually done by sending customers a Xero invoice using the Payrix Auto Debit branding theme. A customer agrees to future payments electronically via their initial invoice, and a payer record is automatically created in Payrix's Payment Console.
However, there will be some instances when a business needs their customers to sign a paper Direct Debit Request (DDR) form before sending out their first Xero invoice.
This can be the case in sectors like personal training where an online form isn’t always practical, or aged care where customers prefer paper forms.
This document explains how to cater for this in Xero and Payrix systems. We explain how you can manually add your customer’s details to both systems, so that payment is automatically debited on the invoice due date.
Data Privacy
Remember that your handling and storage of Direct Debit Request forms that contain customer data must comply with the Payment Card Industry Data Security Standard (PCI DSS). Compliance is mandated by the payment card schemes and banks.
There are four levels of compliance, dependant on how many transactions you process in a year. Find out how your organisation can reach compliance at the PCI Security Standards Council website.
Requirements to get started
Before proceeding, you should have already connected your Xero and Payrix accounts, and configured them for invoice payments.
If you haven’t yet, you can follow the steps in our setup guide:
Steps to take
After a customer has signed a paper Direct Debit Request (DDR) form, you should follow these steps to update both Xero and Payrix systems.
Login to your Xero account: https://go.xero.com
Create a Contact record for your customer in Xero:
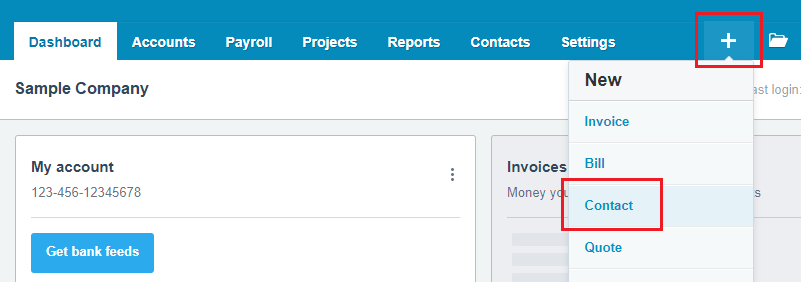
– Click the + button on the main navigation bar.
– Click Contacts.
– Add your customer’s details, click Save.
Login to Payrix Portal: https://portal.payrix.com.au
On the main menu, click Xero.

Scroll down to the Import contacts section of the page.
With the All contacts option checked, click the Display Xero Contacts button.
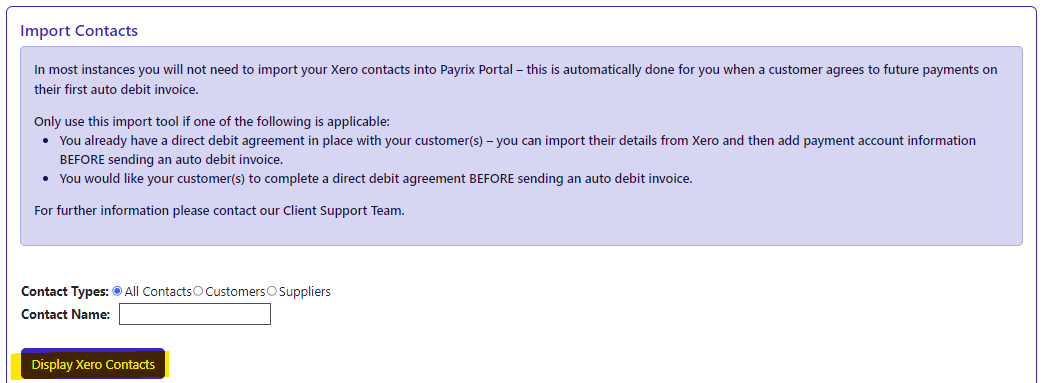
A list of your Xero contacts will be displayed
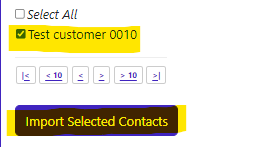
Locate the customer you would like to import, and select the check-box next to their name.
Click Import selected contacts.
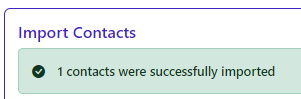
You will receive confirmation that the contact was imported successfully to Payrix.
Click Payers from the main menu.
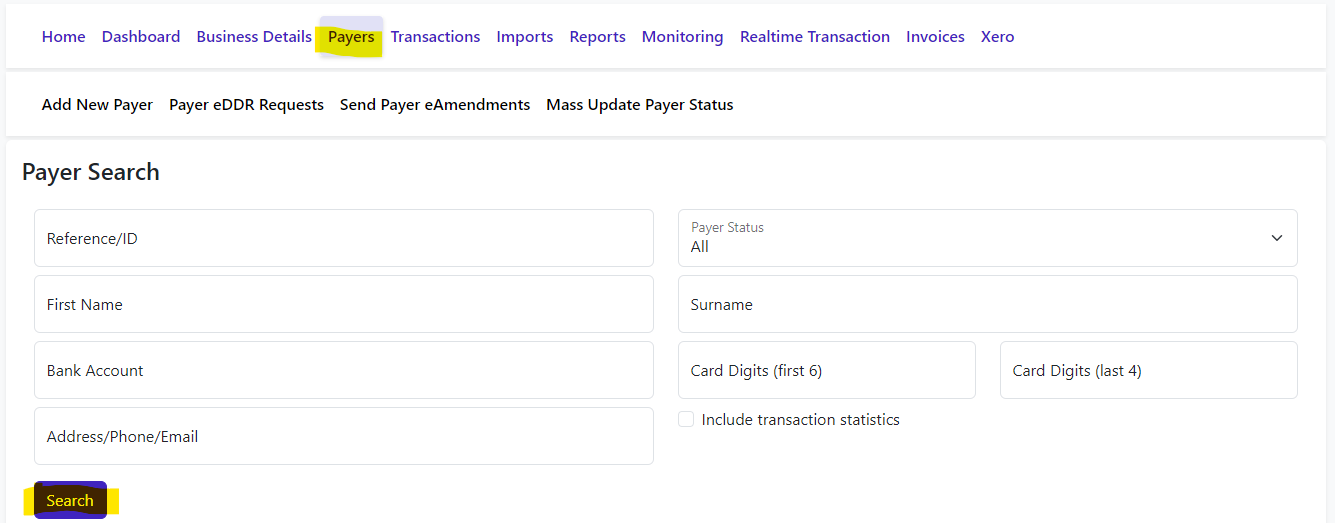
Your new customer will have a Payment Status of ‘Suspended - incomplete setup’.
Click on the Payer # of your new customer.

Your customer’s details will be displayed.
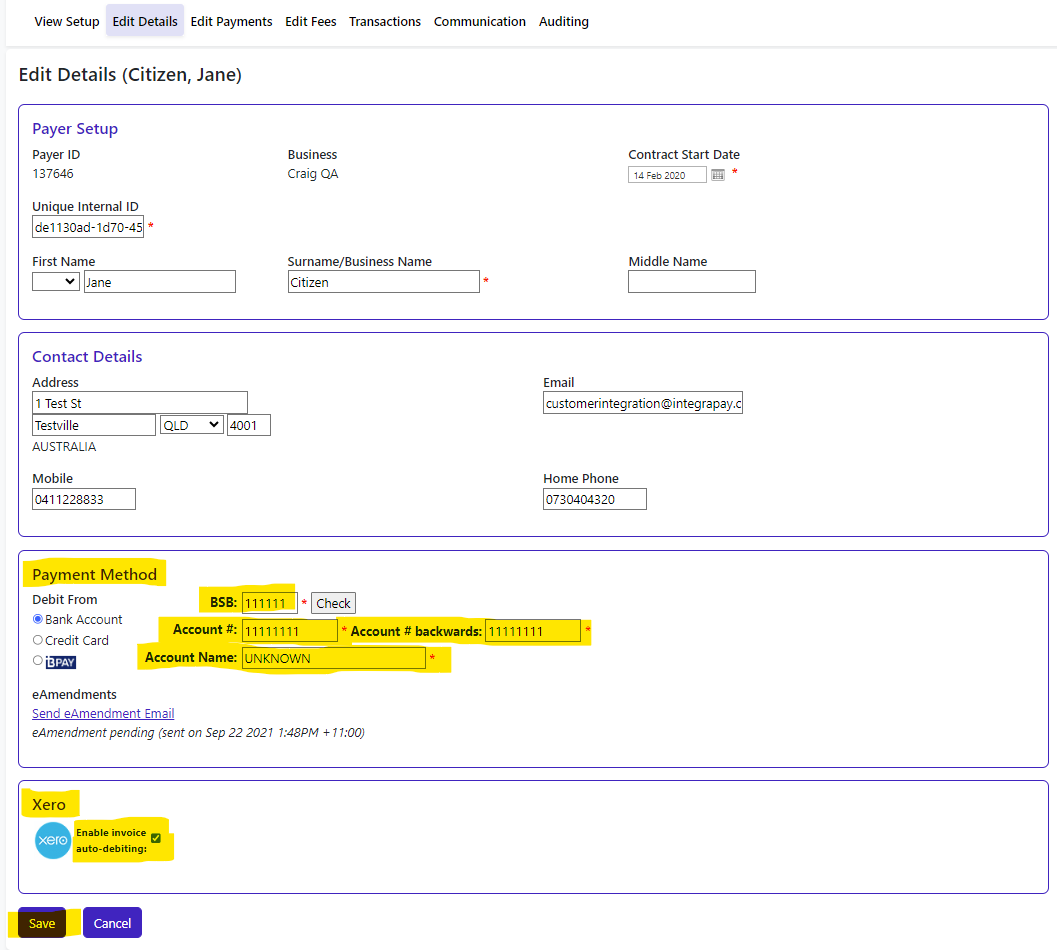
Click Edit Details.

You’ll now need to enter your customer’s payment from their completed DDR Form.
– Select either Bank account or Credit card.
– Enter details of the account they’ve chosen for payment.
– Also Ensure that the check-box Enable invoice auto-debiting is ticked.
Click Save.
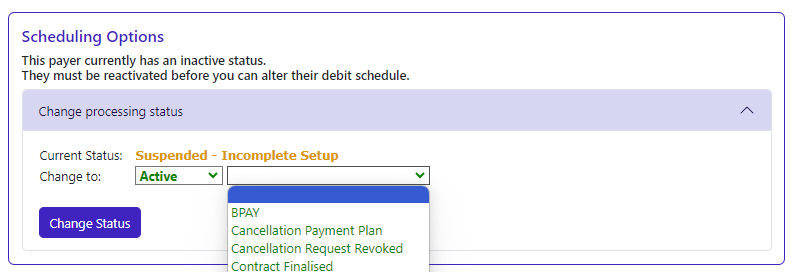
Now click Edit Payments.
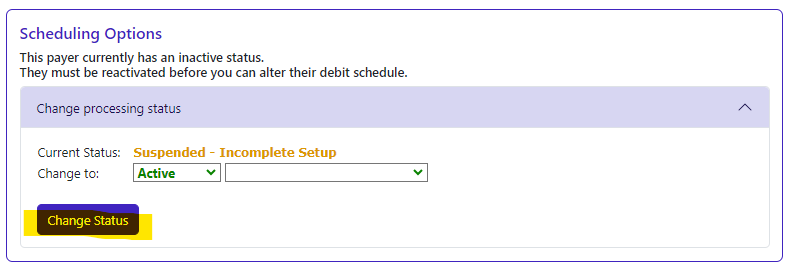
Select Active from the first drop-down.

A second drop-down choice will appear - this is an optional field if you need to add more information about the new status.
Click the Change Status button.
Congratulations!
You have now completed importing your Xero customer’s details into Payment Console.
When you send your customer an auto debit invoice (single or repeating) using the Payrix Auto Debit branding theme, their payment will automatically be debited on the due date – the customer will not need to make a payment.
If your customer clicks the Pay now button on their invoice, this message will be displayed:

Help and Support
If you require assistance with your invoice payments and reconciliation, please contact Payrix Client Support:
Other user guides for Payrix + Xero:
Setup guide
User guide