Setup Guide - Payrix + Xero (Australia & New Zealand)
Introduction
Payrix + Xero is a fast and simple way to collect payments for both repeating and single invoices. It can bring so many benefits to your business, such as:
It will reduce the time you spend on payment collection and administration, as well as improving your cash flow.
It’s simple to automate your repeating payments – ideal for subscriptions and regular fees.
Having a ‘pay now’ button on your invoices gives your customers a faster and more convenient way to pay.
Your customers will get the widest choice of payment options available – credit and debit card, BPAY and direct debit.
Invoice payments are processed securely – Payrix is certified at the highest compliance level for the Payment Card Industry Data Security Standard (PCI DSS).
Bank reconciliation is automated – matching bank account and Xero transactions has never been quicker or easier.
Six easy steps to integration
It’s easy to set up Payrix + Xero. Using this guide you’ll be able to do it in under 10 minutes. You’ll be following these six main steps:
Step 1: Login to both Payrix and Xero
Step 2: Set up bank and clearing accounts in Xero
Step 3: Authorise Payrix access to Xero
Step 4: Connect Payrix to your Xero accounts
Step 5: Create a bank rule in Xero
Step 6: Configure your Xero invoices
Requirements to get started
To start integrating Payrix with Xero, you will need:
An active Payrix account, and access to our Payrix Portal.
An active Xero account, and access to Xero.com
Important note on importing contacts
In most instances you will not need to import your Xero contacts into Payrix Portal. Importing Xero contacts is automatically done for you when a customer agrees to future payments on their first auto debit invoice.
Payrix Portal has a contacts import tool, but this should only be used if one of the following is applicable:
You already have a direct debit agreement in place with your customer(s) – you can import their details from Xero and then add payment account information BEFORE sending an auto debit invoice.
You would like your customer(s) to complete a direct debit agreement BEFORE sending an auto debit invoice.
For audit purposes it is not possible to delete any contacts that are imported to Payrix Portal.
If you need to import your contacts instead of it being done automatically, you should contact our Client Support team before attempting this – they can offer advice and guidance on the best approach for your business.
Step 1: Login to both Payrix and Xero
Setting up integration for Payrix and Xero will require you to log in to both systems. The easiest way to follow the steps in this document is to have the applications open in two browser tabs – one for Xero, the other for Payrix Portal.
1.1 Login to Payrix
Open your web browser
Login to Payrix Portal: https://portal.payrix.com.au/
1.2 Login to Xero
Open a new browser tab - and keep the other browser tab open.
Login to Xero: https://login.xero.com/identity/user/login
You will now have both Payrix and Xero open in two browser tabs.

Step 2: Set up bank and clearing accounts in Xero
This step outlines how to set up the two accounts that you’ll need for invoice payments and reconciliation.
Bank account – your bank account should be the same as your settlement account that Payrix deposits cleared funds into. This account is kept up-to-date with bank feeds or statement imports.
Payrix Clearing Account – this is a ‘current asset’ account which is used in our automatic reconciliation process, matching payments with your invoices.
Later in this guide you will connect Payrix Portal to these two accounts as part of setting up the automatic reconciliation process
2.1 Check your bank account settings
When you created your Xero account, you will have already entered your bank account details. Follow the steps below to make sure your bank account is listed correctly in Xero.
Go to your Xero browser tab.
Click Accounting on the navigation bar.
Select Chart of accounts on the drop-down menu

You will see your bank account listed.
Look across your bank account’s row to check two settings:
It must have a unique Code, i.e. not duplicated in your Chart of accounts.
Its Type must be set as Bank.

If your bank account is not listed, you must set this up in Xero before returning to this step. For guidance, you can visit the Xero Help Centre: https://central.xero.com/s/
Click anywhere on your bank account's row to open details.
A pop-up window will be displayed with your bank account details - make sure that all your details are correct.
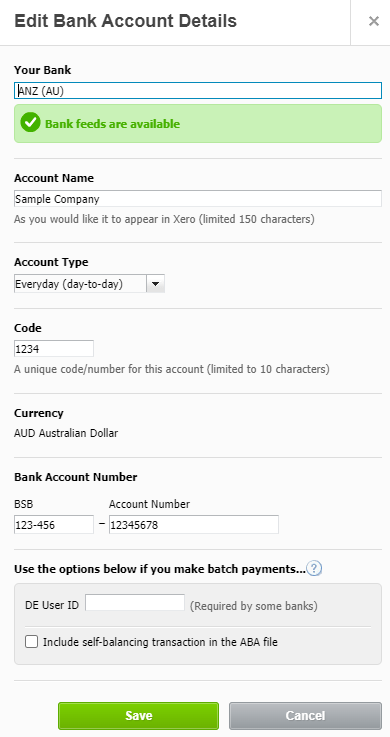
Close the pop-up window when you’ve done this - click Save if you made changes, or click Cancel if you didn’t make changes.
2.2 Create a clearing account
Stay on your Chart of accounts page.
Click the Add Account button.
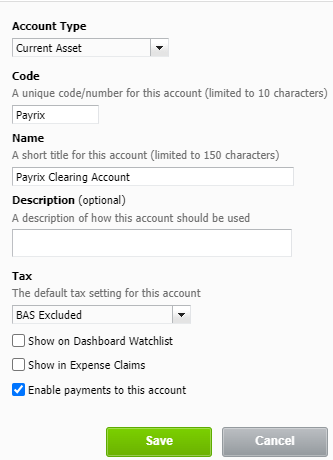
The Add New Account pop-up will appear.
Enter these datils into the following fields:
Account Type: Select ‘Current Asset’ from the drop-down.
Code: Type ‘Payrix’.
Name: Type ‘Payrix Clearing Account’.
Description: Type a description if required (this is optional).
Tax: Select ‘BAS Excluded’ from the drop-down.
Enable payments to this account - it is important that you tick this box.
Click Save.
Step 3: Authorise Payrix access to Xero
This is a crucial step in your integration – authorising Payrix to access your Xero account.
Return to your Payrix Portal browser tab.
Click Xero on the navigation bar
Click the ‘Authorise Your Xero Account’ button.
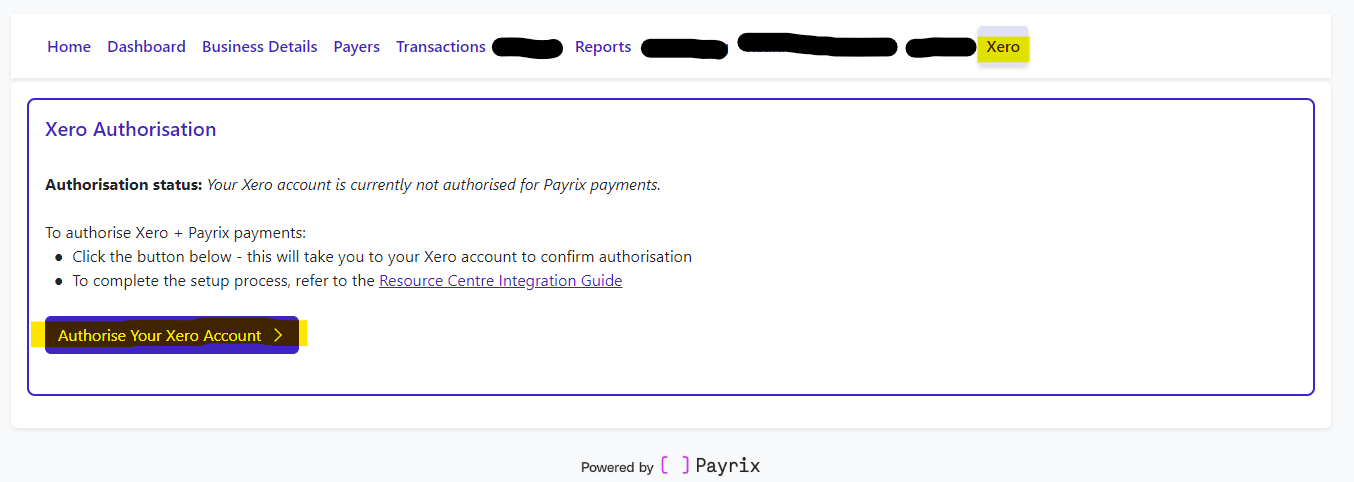
The page will then divert to the Xero site and you will see a box asking you to authorise access.
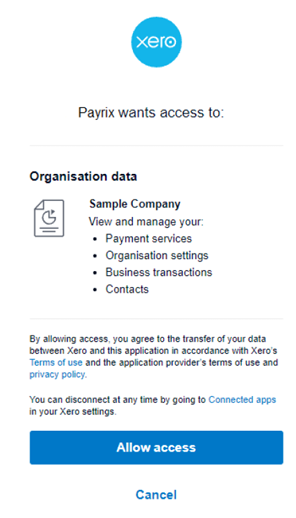
If you have more than one Xero account, select which one you would like to authorise from the drop-down list.
Click ‘Allow access'.
Step 4: Connect Payrix to your Xero accounts
This step outlines how to connect Payrix Portal to the two accounts in your Xero chart of accounts covered earlier – your clearing account and bank account.
4.1 Select your clearing account
Stay on your Payrix Portal browser tab.
Click Xero on the navigation bar.
Scroll down to the Configuration Settings section of the page.
For option: Xero account used for standard invoice payments, click Change Account and select ‘Payrix Clearing Account’ from the drop-down list.
Click Save Account.

4.2 Select your bank account
The second option is your bank account that Payrix will apply overpayments to.
Follow these steps to make sure you’ve nominated the correct bank account for overpayments to.
Return to the Configuration Settings part of the page.
The second option, Xero account used for overpayments, will default to the bank account listed in your Xero chart of accounts.
If the correct bank is listed, then you don’t need to do anything.
If you need to change this account, click Change Account and select the prefereed account from the drop-down list.
Click Save Account.
Step 5: Create a bank rule in Xero
Now that you’ve connected your bank and clearing accounts in both systems, you will need to set up a Bank Rule – this makes automatic reconciliation possible. Follow these steps to set up your Bank Rule:
Return to your Xero browser tab.
Click Accounting on the navigation bar.
Select Bank accounts on the drop-down menu.
Click Bank Rules.
The Bank Rules page will be displayed. Click on Create Rule.
Select Receive Money Rule tab on the menu. The Receive Money Rule dialog box will appear. Work down the screen to select/type each ‘condition’ for your bank rule.

Condition 1
Apply a bank rule: select ‘All conditions match’.
Add condition: Select ‘Any text field’ and ‘contains’ and then type ‘IPAY Xero’ in the last field.

Condition 2
Select ‘an existing or new contact’
In the next field, type ‘Payrix'.

Condition 3
Disregard first table that is titled ‘Automatically allocate fixed value line items’, and skip to second table that is titled ‘With any remainder, allocate ratios using percent line items’ and complete the below fields:
Description: type ‘Invoices’
Account: select ‘Payrix Clearing Account’ from the drop-down.
Tax Rate: select ‘BAS Excluded’ from the drop-down.
Percent: select ‘100%’.

Condition 4
Set the reference: Select ‘from the description’ from the drop-down.

Condition 5
Add rule details: Select the bank account you are nominating for Payrix settlements and name the rule ‘Income from Payrix’.

Click Save.
Your new bank rule will then be listed on the page.

Step 6: Configure your Xero invoices
Follow this step to create your Xero templates for both single and repeating invoices.
To enable Payrix payments from Xero invoices, you will need to create and link Xero invoices to your Payrix account. This is done in Xero using a feature called branding themes. Below we show you how to create two branding themes:
Payrix Pay Now – for single (or one-off) invoices, where a customer makes a payment with no agreement for future payments.
Payrix Auto Debit – for repeating (or recurring) invoices, where the first invoice includes an agreement covering future invoices in a repeating cycle.
6.1 Create a Payrix Pay Now branding theme
Return to your Xero browser tab.
Click your organisation name on the navigation bar.
Click Settings on the drop-down menu.
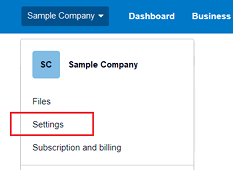
A list of organisation settings will be displayed - select Invoice settings
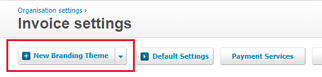
Click on New Branding Theme.
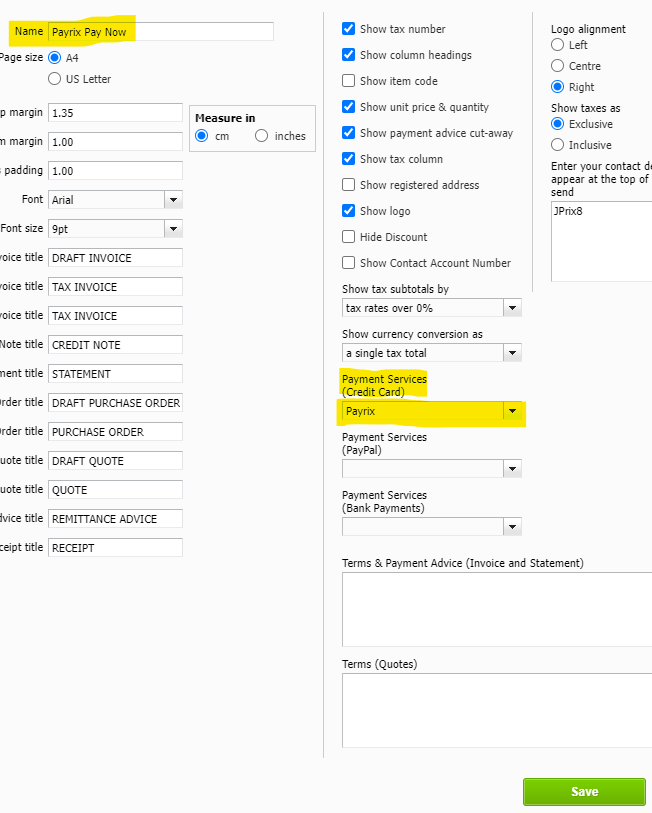
In the Name field, type ‘Payrix Pay Now’
In the Payment Services (Credit Card) drop-down, select ‘Payrix’
Click Save.
Details of your new branding theme will then be displayed, along with Xero’s default Standard branding theme.
6.2 Create a Payrix Auto Debit branding theme
Click on New Branding Theme.
In the Name field, type ‘Payrix Auto Debit’
In the Payment Services (Credit Card) drop-down, select ‘Payrix’
Click Save.
Details of your Auto Debit branding theme, along with the Pay Now theme you created previously and Xero’s default Standard branding theme.
6.3 Uploading your business logo
You can now upload your business logo which will be displayed on any PDF documents attached to your Xero emails.
Click on Upload Logo for both branding themes.
We recommend using the same logo you use in Payrix Portal for a consistent customer experience.
6.4 Optional step to re-order list of branding themes
To make your invoicing even easier, you can re-order your branding themes according to which one you will use the most.
The first branding theme on this page is the default for all invoices, and you can select other themes from a drop-down list.
Click the six dots icon next to the title of the branding theme you want to move up or down
6.5 Enable the Payrix Auto Debit branding theme
Return to your Payrix Portal browser tab.
Click Xero on the navigation bar to refresh your page.
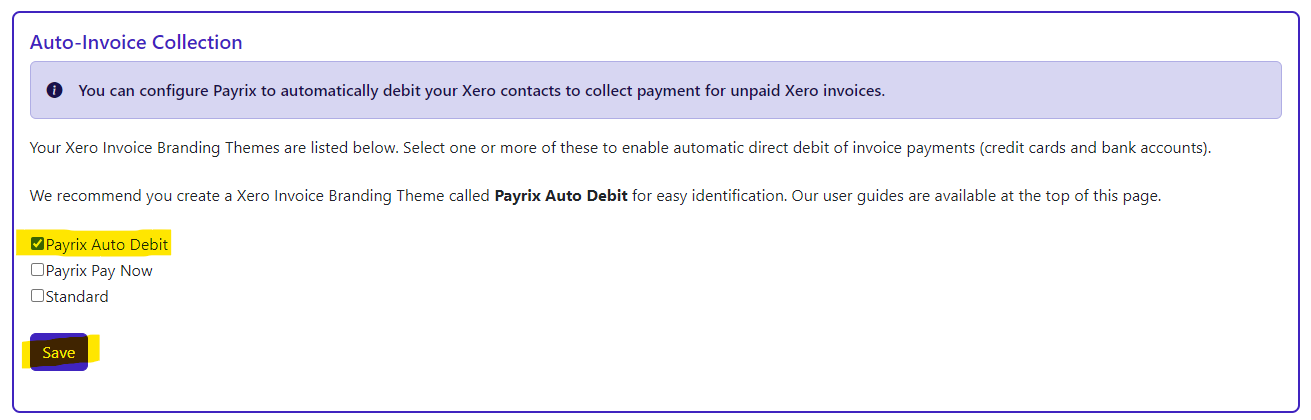
Scroll down the page to the Auto-Invoice Collection section – you’ll see your two Xero branding themes listed.
Select ‘Payrix Auto Debit’.
Click Save.
Congratulations, you have completed the setup process for Xero + Payrix. You are now ready to create and send invoices.
Help and support
When you have completed your setup, you can refer to our main user guide, which includes guidance on sending invoices; bank reconciliation; updating customer payment details; and resolving common transaction issues.
User guide: Payrix + Xero (Australia & New Zealand)
If you require further assistance with setting up Payrix and Xero, please contact Payrix Client Support.