Payrix Payment Portal User Guide
Payrix Payment Portal is your secure portal for accessing and managing your customers' payment information. It is located at: https://portal.payrix.com.au/Login.aspx
Payrix Payment Portal enables you to establish new direct debits, view existing payment details, generate reports, and make payment amount or schedule changes 'live' 24/7 in complete security.
Payrix is fully compliant with the Payment Card Industry Data Security Standard (PCI DSS) Level 1, and a registered Australian Financial Services License holder (AFSL No. 418105) with ASIC.
Payrix Payment Portal is secure with 256-bit TSL (v1.2) encryption to ensure the highest level of protection. All data is protected with our comprehensive off-site data storage and recovery facility.
Records are backed up in real time and stored on Enterprise Grade servers within Australian Level 1 PCI DSS compliant and T4 Certified data storage and processing centres across two capital cities.
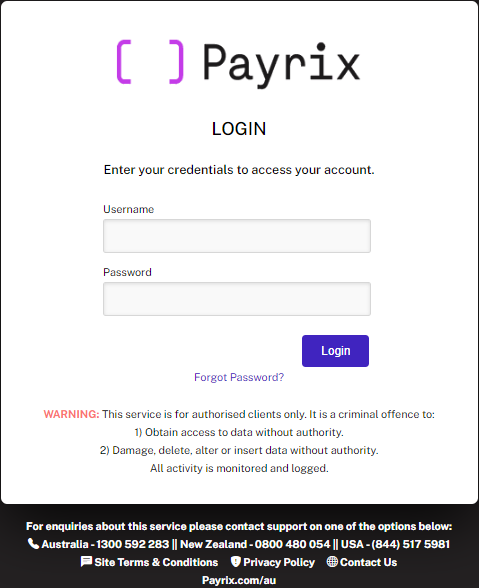
Log In
To access Payrix Payment Portal you must be a registered client with Payrix and have received a username and password from Payrix. If you have not received your username and password, please contact Payrix Client Support.
To commence simply enter your username and password into the fields provided and click the Log In button.
If you are logging in for the first time you will be requested to change the Payrix issued Password to one more memorable to you. To change your password you will be prompted to enter the Payrix issued Password followed by your new password.
Note: To ensure maximum security your password must be a minimum of 10 characters long and contain at least 2 non-alphanumeric characters (symbols).
If you don’t access your Payrix account for more than 30 days, your access may be locked and you may need to contact Payrix to unlock it or reset your Password.
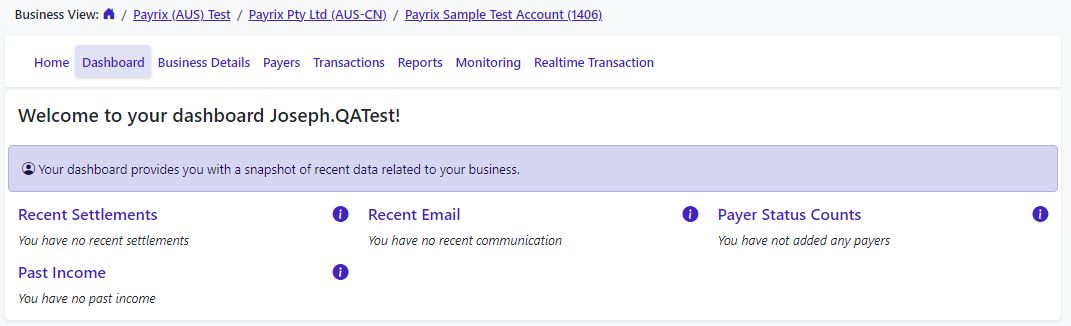
Homepage
The first screen you will see after logging in is your Home page. It contains a menu bar at the top of the page for navigation to the services you have available to you. If you click on ‘Dashboard’ you will be able to view your Business Snapshot.
It also provides you with a snapshot of your business operations with Payrix:
Recent Settlements – shows the date and value of the last 3 Payrix settlements to you.
Past Income – is a list of the past 6 months Payrix settlements for the calendar months listed.
Recent Communications – is a list of the latest reports issued by email for quick reference. Clicking on the date will open the report in PDF.
Upcoming Debits – displays the total value of the scheduled debits for the next 5 business days.
Payer Status Counts – is a more detailed list of your customer’s current statuses. Clicking on the status in this section will display all of the customers that are set to the status selected.
When accessing the site for the first time, each of these areas will be blank.
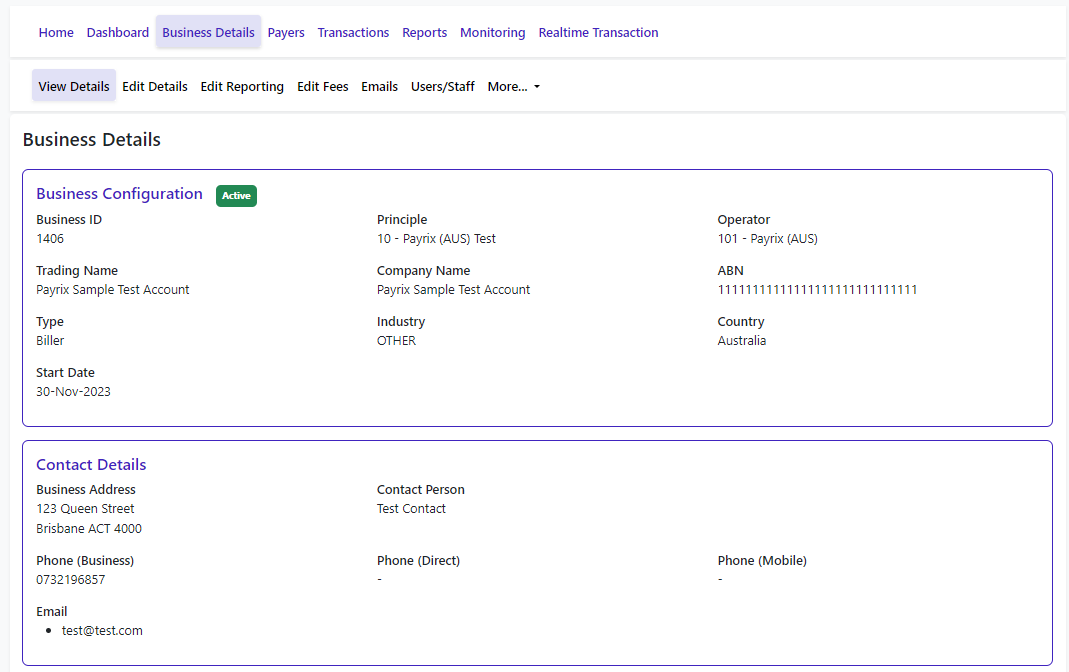
Business Details
The Business Details screen displays the basic information you have provided relative to your business.
By default the page will open to the View Details page as shown in the grey Sub‑Menu bar.
View Details
Displays the business details and contact information of your business. Only authorised users may change this information upon written request.
Transactions
Provides a detailed list of all transactions performed by Payrix in date order.
The list includes the customer name, account type, payment value and the result of the payment. Clicking on the customer name or report will open the selection in a new window.
Emails
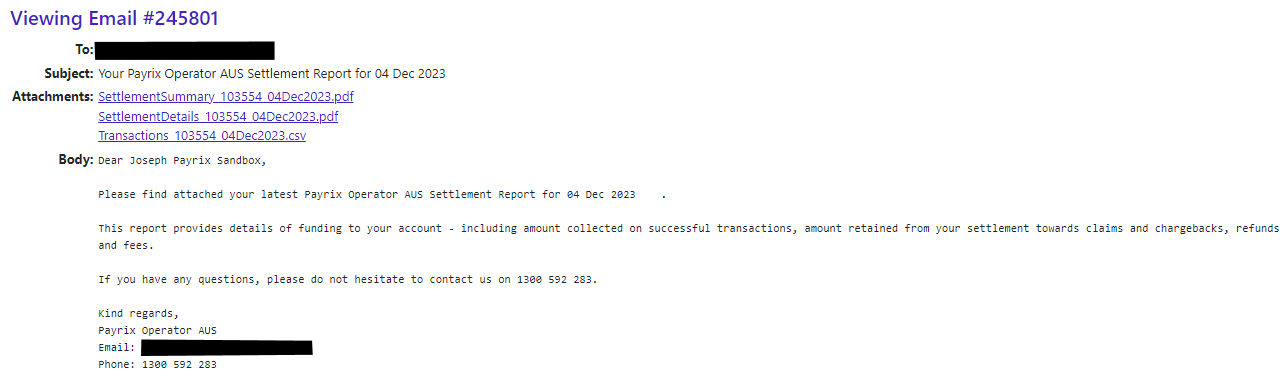
This section allows you to search, view and print any report or invoice Payrix has previously emailed.
The search function allows you to refine your search to date, and/or report type or show all reports ever issued.
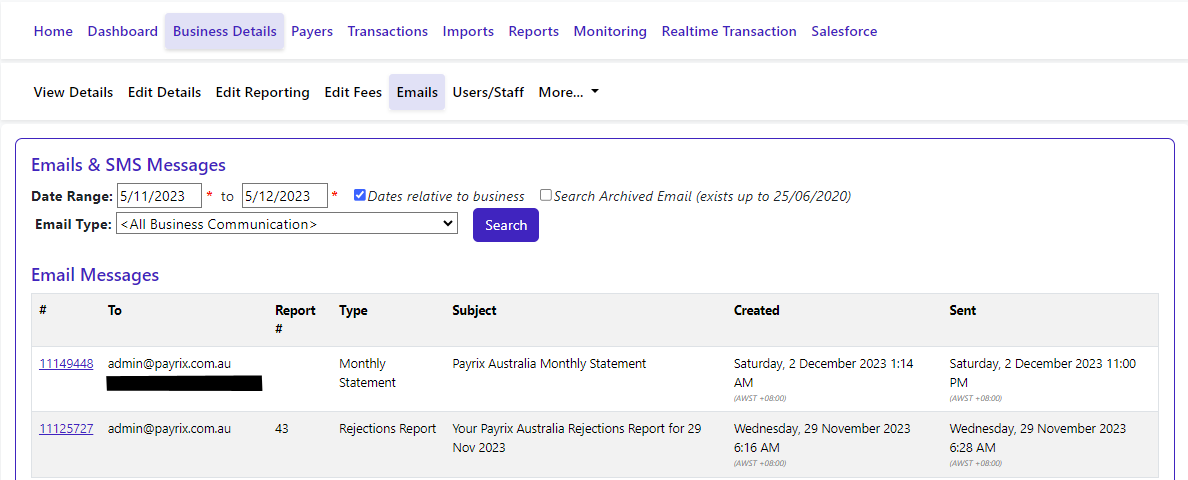
To view the report, click on the report number in blue and then the report name listed on the Attachments line.
You also have the ability to re‑send the email by adding an address in the Resend area at the bottom of the page.
Users/Staff
Upon the initial set up of the Business with Payrix, Principle User access to the Payrix Online Portal is granted to the nominated manager / owner. The Principle User has the ability to perform all functions available within the site including the ability to add additional Users/Staff access to the Payrix Online Portal.
As an added security measure, Payrix records the User, IP address and log in times of the User upon access and whenever there is a change made to a record.
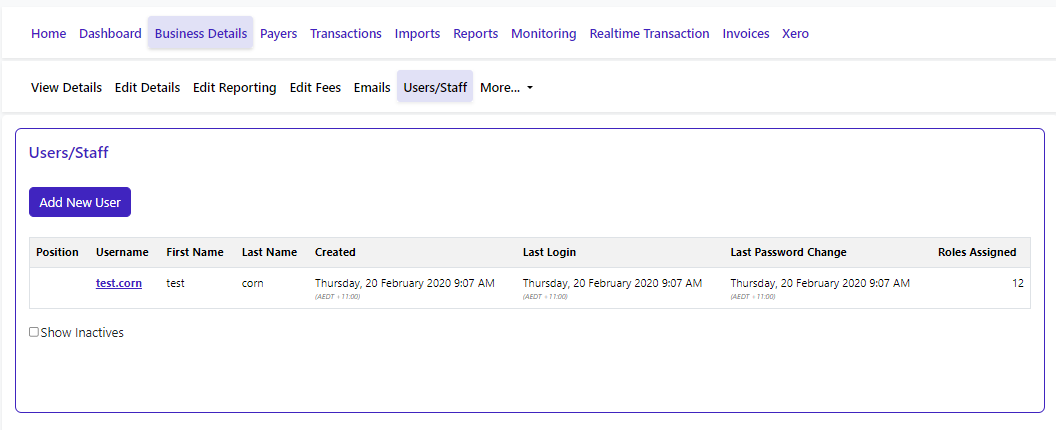
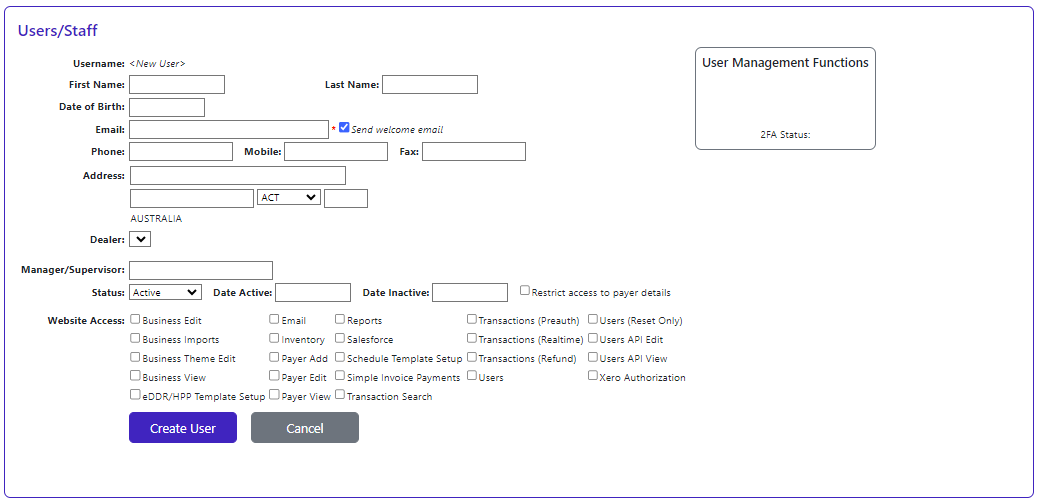
To Add a New User, select Users/Staff in the Sub‑Menu and then select ADD NEW USER. Enter the details of the User/Staff as requested and select what access/actions they require in the section called Website Access. To save, select Create User.
Upon creation the users User Name and Password all appear on the page. Copy the details to provide to the User.
Payers
Payers is the terminology we use to reference your customers as these are the people who are paying you.
The Payers section is your access point for everything relating to your Payers from creating new debit arrangements, searching for Payers or amending existing Payer records. By default, the page will open at the Payer Search page.
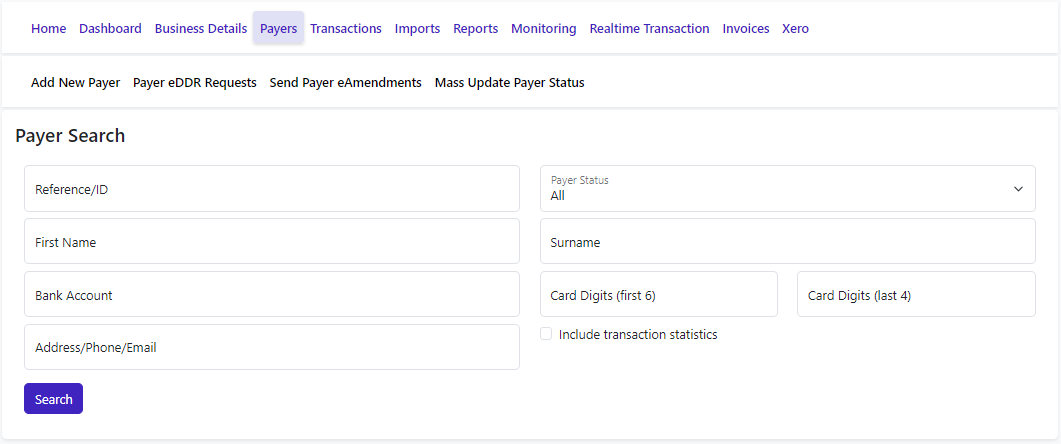
Payer Search
The Payer Search area allows you to search for a specific Payer based on selection criteria. To display all of your Payers simply click on Search without selecting a criteria. To search for a specific Payer, you have the option to enter one or multiple fields.
You can search by:
Reference ID (Our reference number or your reference ID)
First Name
Last Name
Address (enter partial or full address)
Payer Status
Bank Account Number
Credit Card (search looks at the first 6 and last 3 numbers only)
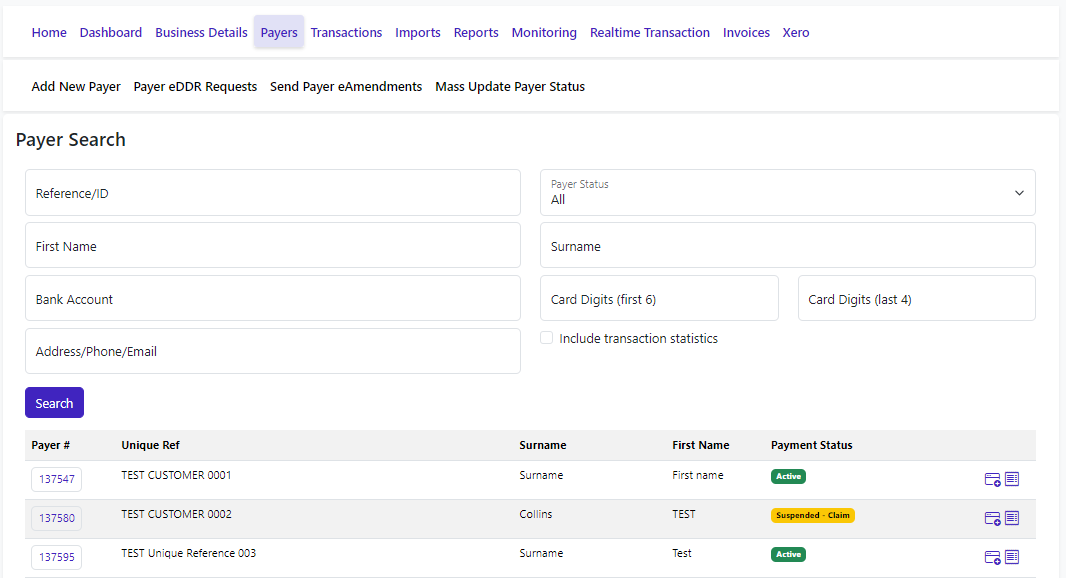
The search results can be sorted by column heading by clicking on the heading name. To select and view a particular Payer from this list, click on the Payer #.
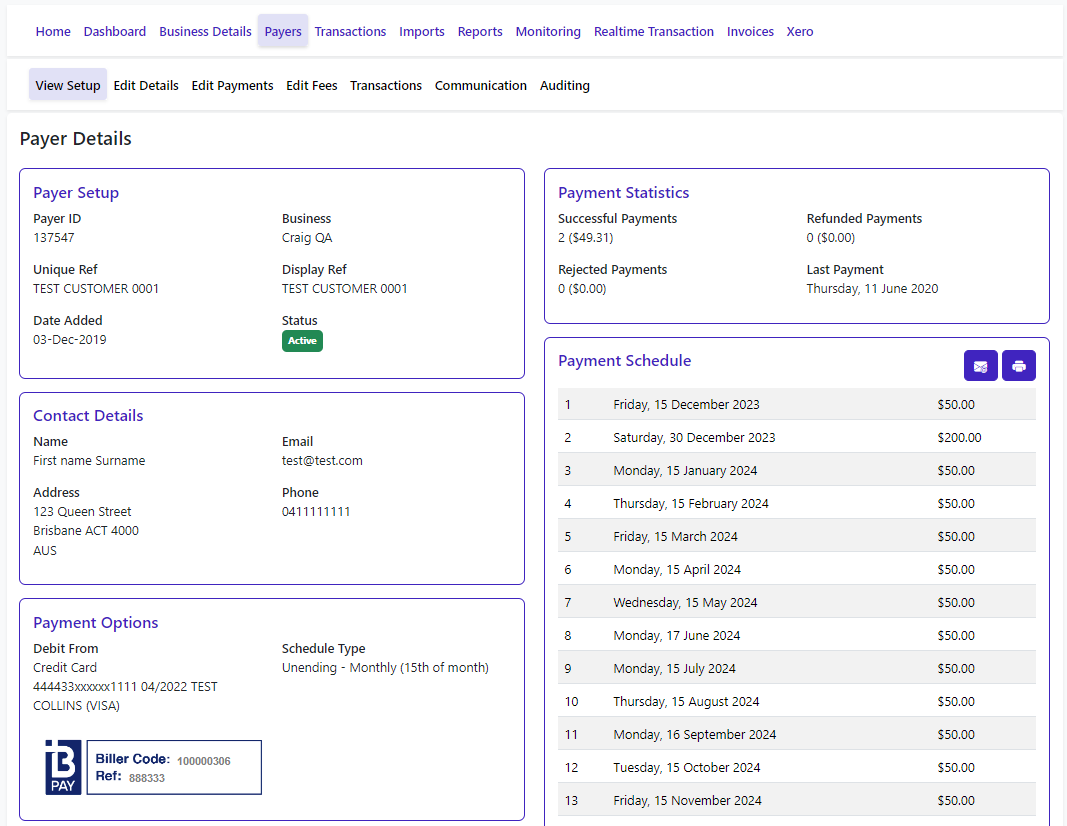
Payer Set Up
Upon selecting a Payer their record will open in the Payer Setup page.
This is the dashboard view to the Payer, their contact details, debit details, current payment schedule and payment statistics overview.
From this page use the sub‑menu (grey menu bar to perform amendments or view past transactions, notes you may have made or access the audit history.
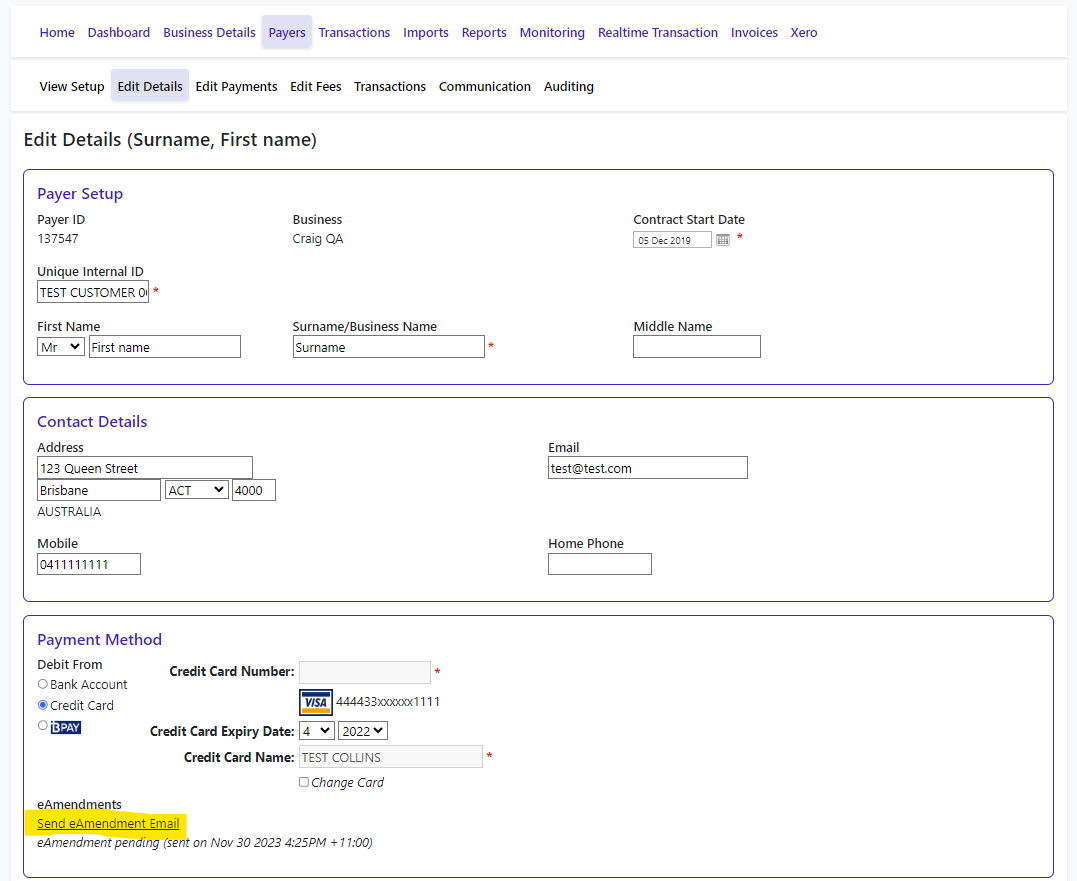
Edit Details
This page allows you to change the personal details of the Payer, including the account details or card they are being debited from.
Click on Save once all amendments have been added.
When altering a Payer’s bank or card details you should obtain a new, signed Direct Debit Request Form as proof of authority to debit the customer’s account.
Alternatively, click on Send eAmendment Email and an email will be sent to the Payer allowing them to submit their new details electronically.
Once submitted, the change will occur automatically and a copy of the change will be sent to you and the Payer for your records.
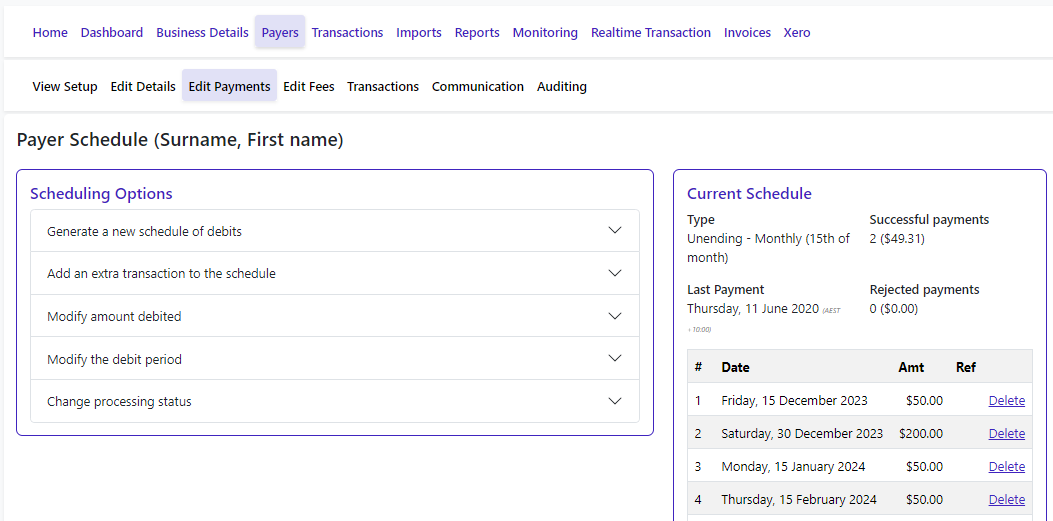
Edit Payments
The Edit Payments page allows you to alter the Payer’s schedule as displayed on the right hand side of the page.
You can:
Generate a new schedule of debits
Add an extra transaction to the schedule
Modify amount debited
Modify the debit period
Change the processing status
The Current Schedule shows the next 10 scheduled payments for this Payer.
In the example shown, the Payer has an unending schedule, set to occur on 15th of each month for the amount of $50.00.
You will notice a payment for the month of December has been added to $200.00 as an extra one-off payment.
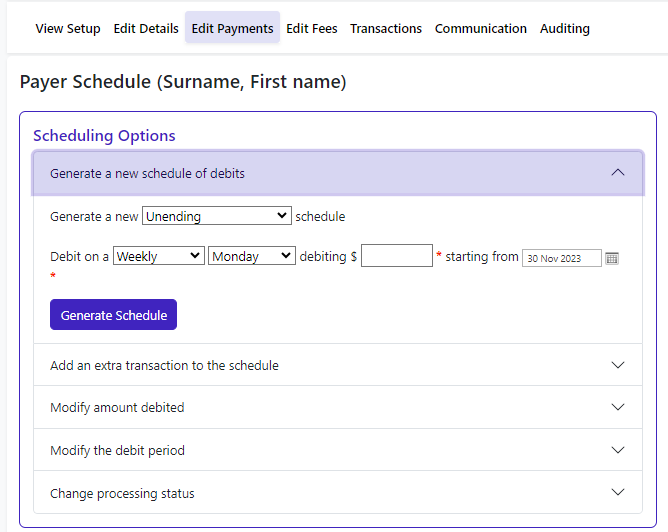
Generate a new schedule of debits
This function generates a brand new schedule of payments.
Note: This function will completely remove the current schedule of payments for the Payer and replace it with a new payment schedule.
Past payment history however will remain intact.
To generate a new schedule select/complete all of the requested information about the new schedule. Then click on Generate Schedule to save the changes.
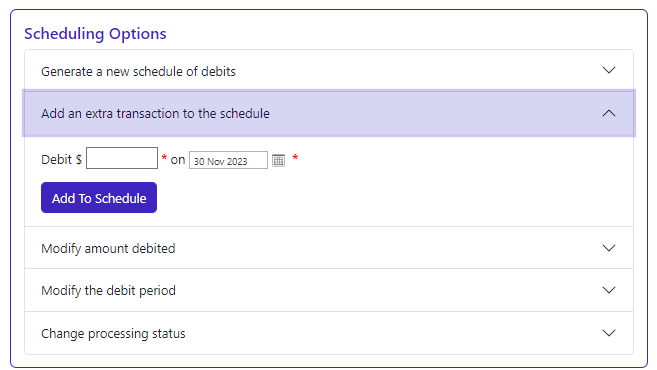
Add an extra transaction to the schedule
This function allows you to add an extra payment to the Payers payment schedule in addition to their existing payments.
To add an additional payment for the Payer, simply enter the amount and date for the debit then click Add to Schedule to save the changes. The payment will be immediately added into the Payers schedule.
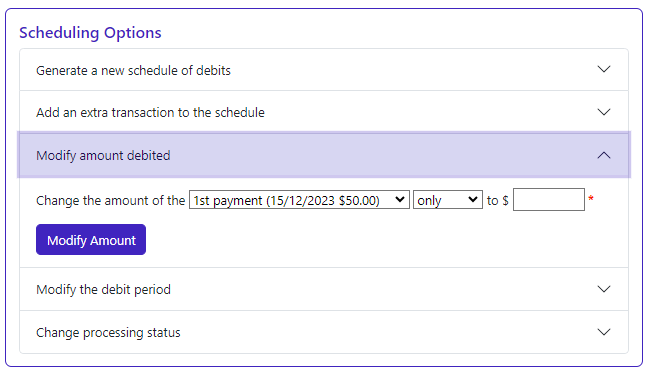
Modify amount debited
This function allows you to change the payment value for a specific payment or all/some future payments for a Payer without changing the date or frequency of the Payers payments. This function is used to cater for single or permanent fee changes.
Select the single payment to change or the date of the first payment you wish to change. Select Only for a single change, or Onwards to change the current and future payments. Enter the new payment amount and click Modify Amount to save the changes.
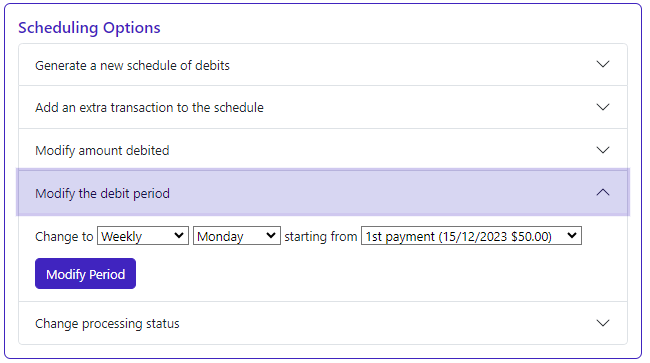
Modify the debit period
This function allows you to modify the frequency of payments from a specified date. Select the payment frequency, the day (or date if monthly) and then select date from which you would like this change to take effect.
Click Modify Period to save the changes.
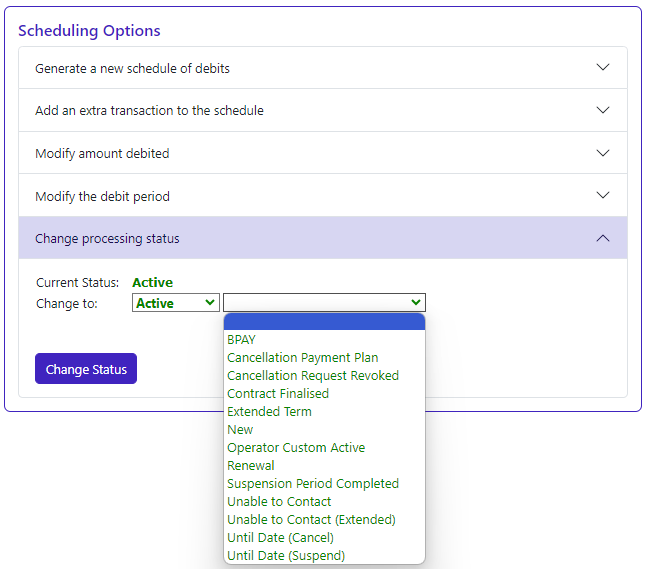
Change Processing Status
This function allows you to change the Payers Status. Within Payrix's system there are three Status groups: Active (green), Suspended (yellow) and Cancelled (red).
The Suspended and Cancelled statuses will stop any debits from taking place.
Activating a Payer after they’ve been Suspended or Cancelled will trigger the Payment Schedule to commence again. If you are unable to select the desired status for your Payer, you may need to contact our office by either phone or email to make the change for you.
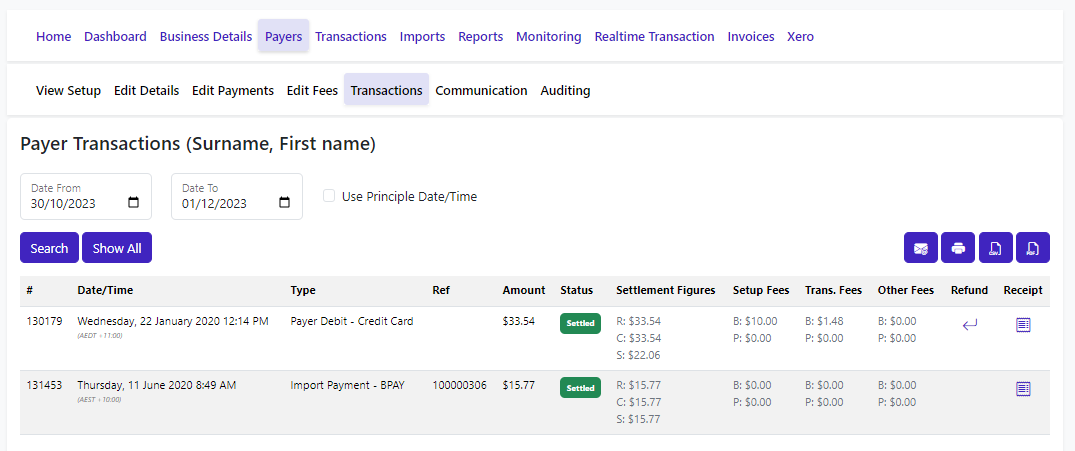
Transactions
This screen displays all the past transaction requests and results for the selected Payer. By default the page will show the most recent payments.
To view specific payments enter a date range and click Search.
To view all past payments, click Show All.
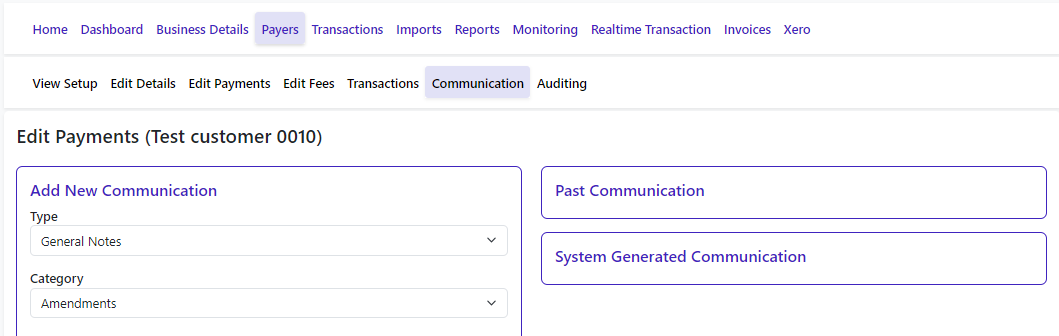
Communication
This section allows you to make general notes and/or communication that you may wish to keep relative to your Payer.
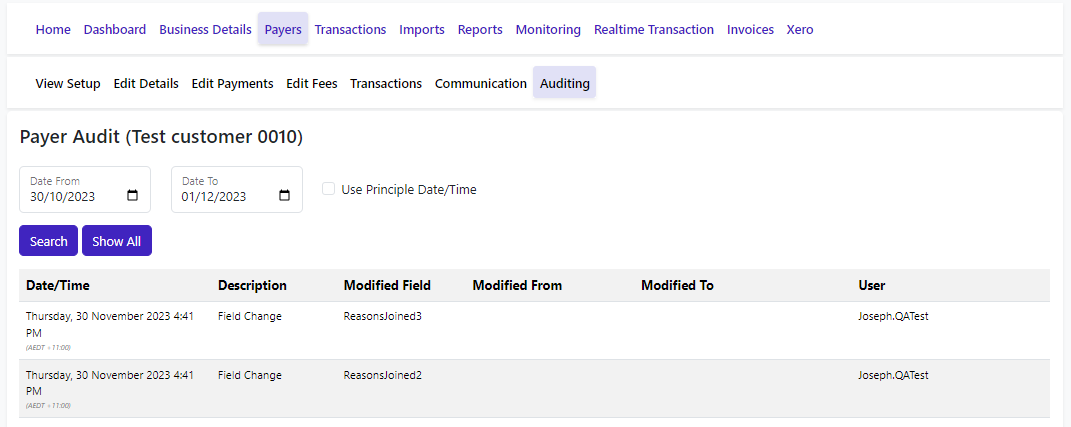
Auditing
The Auditing page displays all activity for the Payer since the record was created.
The page displays the date the change was made, a description of the change and who made the change.
You will see some changes have been made manually by a User Name, or automatically by the Payrix payment processing system or via your API connection if you have integrated software.
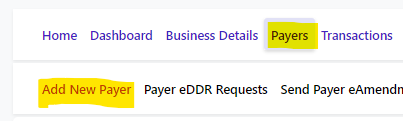
Add New Payer
To add a new Payer, select Payers on the main menu (black menu bar) and click Add New Payer in the sub-menu (grey menu bar).
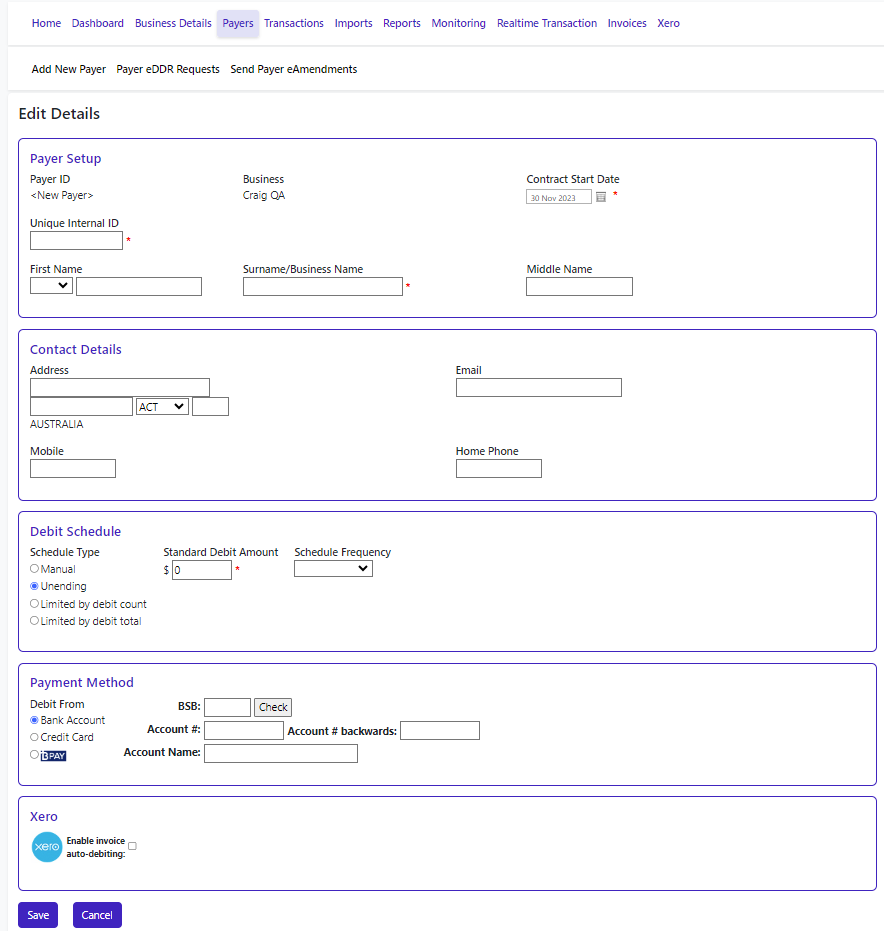
Complete the requested information. Fields marked with an asterisk (*) must be completed. Click Save.
Payrix will generate a Payer ID for the Payer you have created and you will be returned to the Payer View Setup screen upon completion.
The field marked Unique Internal ID can be used to record your own reference details for your customer, if applicable. If this field is left blank, the system generated Payer ID will be utilised instead.
You should verify the information you have entered and the relevant payment schedule to ensure it is what you and your customer have agreed to.
Note: When entering a customer ensure that you have a signed direct debit authority from the Payer. Ensure the Card or Account Holder has signed the form. Failure to do so may result in funds being refunded back to the Payer by their financial institution if there is a dispute of payment.
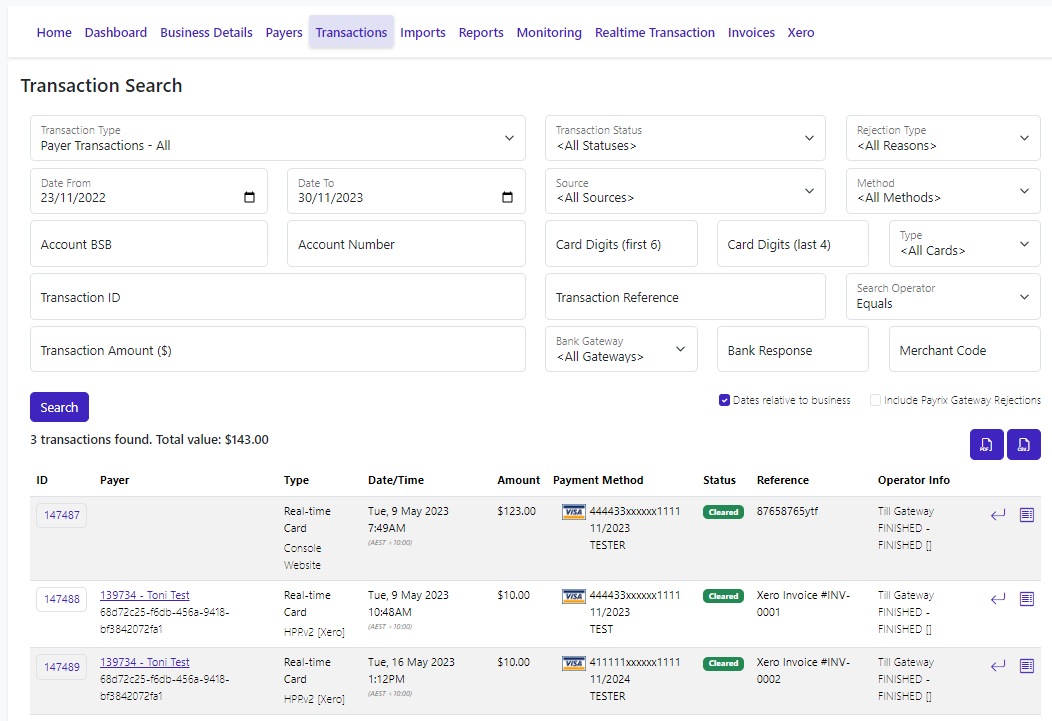
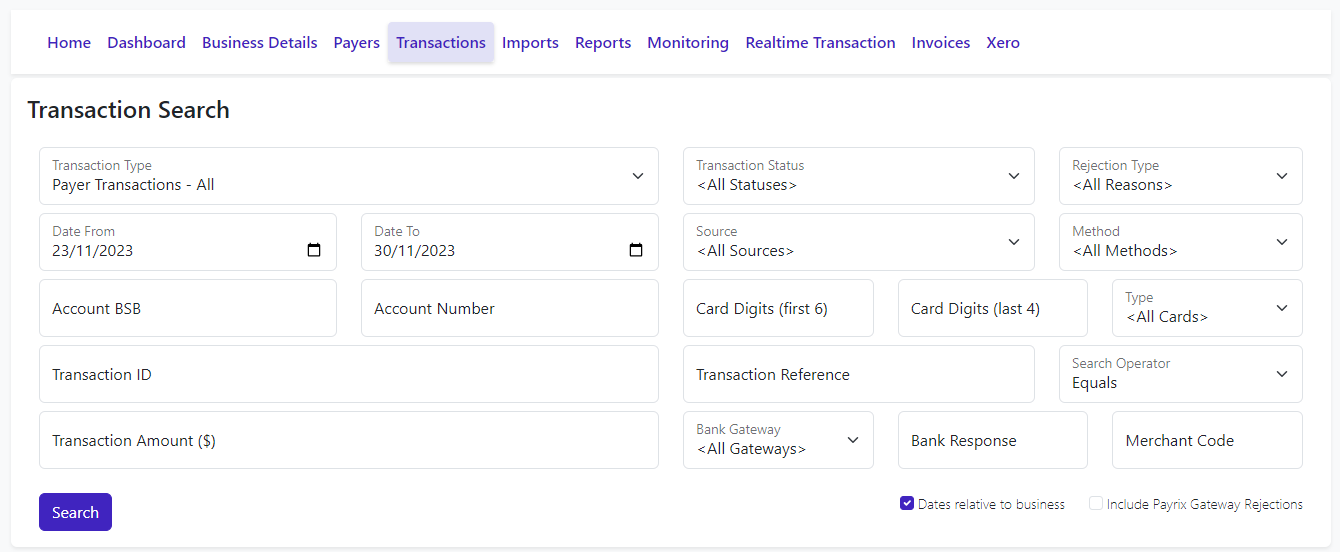
Transactions
This screen displays all the transactions Payrix has performed for your business.
Search parameters can be narrowed by utilising the Transaction Type, Date Range, Transaction Amount and/or Status fields. You can also search for all transactions performed on a specific card number or bank account.
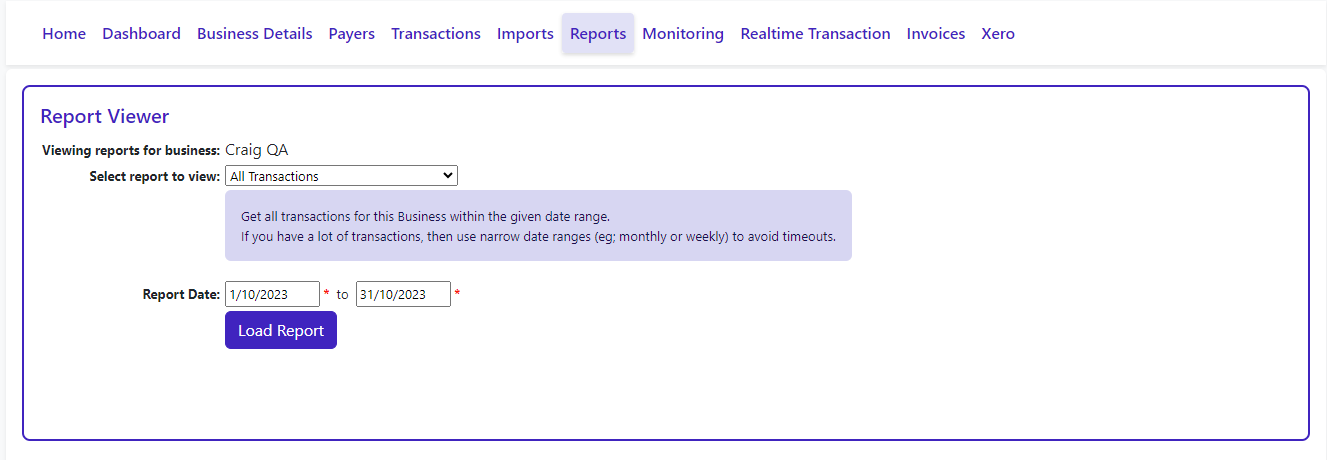
Reports
The Report viewer allows you to generate general reports for viewing, printing and saving. Simply select the desired report, confirm the date range and then click Load Report. Some reports may require you to select from an additional menu.
The report view window will then allow you to scroll through the report and pages. You also have the ability to save the report as an Excel, CSV or PDF file as well as print.
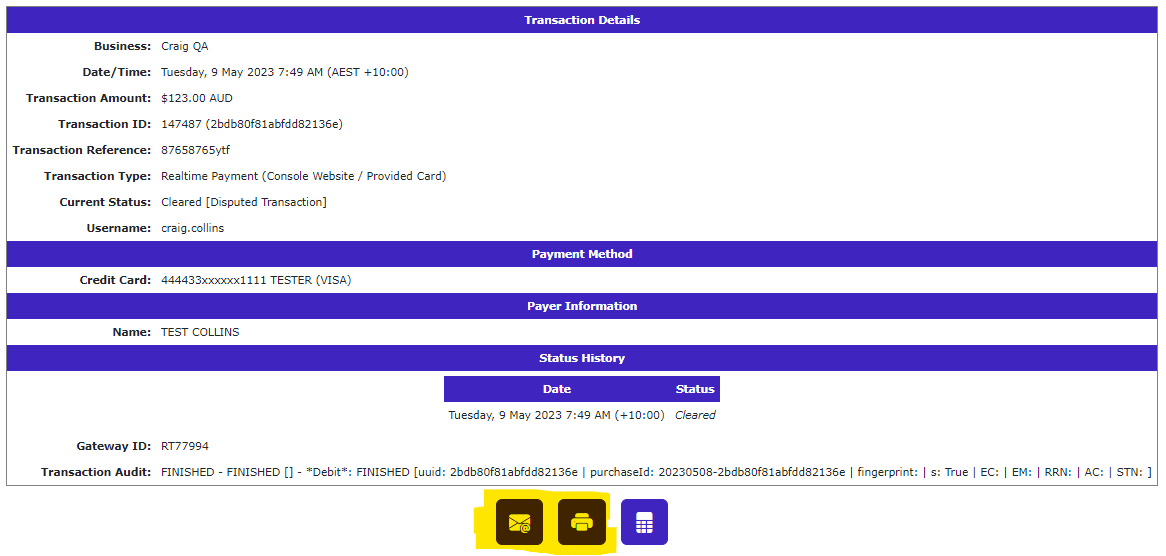
Transaction Receipts
To access a Transaction Receipt, locate the transaction and click on View Receipt.

The Transaction Receipt will then be displayed. The highlighted icons can then be used to email or print the receipt:
Help and Support
If you require assistance please contact Payrix Client Support:
Australia
1300 592 283
admin@payrix.com.au
New Zealand
0800 480 054
admin@payrix.com.au
USA
844-517-5981
support@payrix.com.au